Wednesday, December 14, 2011
How to Use Google Webmaster Tool
Google Webmaster Tool is a tool provided by google to see and rate our blog. By using the Google Webmaster Tool we can more easily do SEO steps have to be run. Google Webmaster Tool can we get for free and easy, we should have only a google account. Pasa SEO experts also strongly recommend using Google Webmaster Tool. Because I'd been talking about Google Webmaster Tool means in this post I will describe and explain How to Use Google Webmaster Tool Please follow the steps below to use Google Webmaster Tool:
A. Login to https://www.google.com/webmasters/tools. If you are logged into blogger then this site will automatically log in with your google account.
2. Once the dashboard is displayed enter your blog address in the text box and click Add Site.
3. After you click Add the URL of your blog site added to Google Webmaster Tool. though so you need to verify the URL of your blog first. The aim to make sure whether you are the owner of the blog that you entered.
4. Then select the verification With Tad Meta.
5. After appearing Meta Tag Code for Verification Copy the code into your blog, How to Login to blogger and click on Layout and select Edit HTML. After that look for code <head>'ll find the code easier to use the CTRL F. Klo you found her <head> code and paste code from the Google Webmaster Meta Tag Tool below. if already click save template.
6. After that back to Google Webmaster Tools page and click verify. after blog Verified the status of your blog in Google Webmaster Tool to be verified.
Wednesday, November 2, 2011
How to Create a Form Contact Us on Blog
With the Contact
Us page on the blog can make your blog look more professional and
Features Contact Us This is also a prerequisite to enrolling in Google
Adsense.
Well this time I will give a tutorial how to create contact us form in Blogger by using a third party that is emailmeform.com.
Steps to Contact Us Form is as follows:
A. Login to Blogger
2. Create two new pages in your blog
- The first page titled Contact Us, this page will be inserted HTML code.
- The second page titled Contact Confirm and then fill it with: 'Thank you for sending e-mails to us'
3. Open website EmailMeForm.com
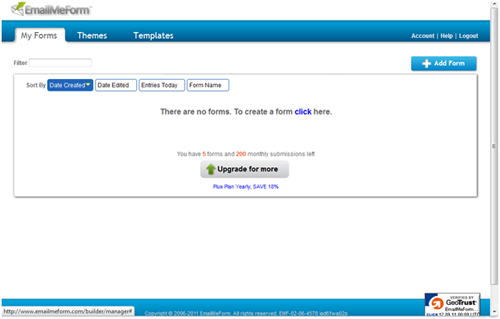
4. Click on "Signup Now For Free"
5. Then fill out the form with yourself. Ie: username, password and email
6. Check the statement "I aggre to EmailMeForm Term of Service"
7. Then, click Next
8. Your account has been finished, now check your email and get the account verification email. Follow the instructions on the email, click the verification link.
9. Then click the Add Form
10. Next you will be asked to customize your template. In this section, you can modify at will look like what you want.
11. Confirmation Options section, check the URL Redirect option and then fill the second page with a link to the newly created earlier, so visitors will switch to this page if you have sent an email in your contact form.
12. Then click Save Form
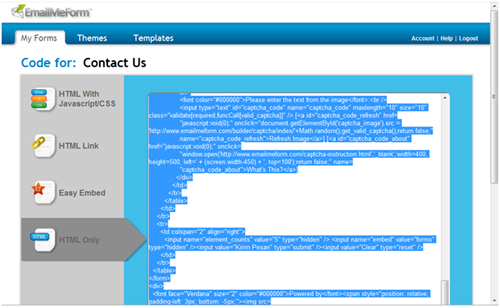
13. The next step, copy the HTML code to the first page was created and published page.
14. Now you are ready contact form, please try.
Well this time I will give a tutorial how to create contact us form in Blogger by using a third party that is emailmeform.com.
Steps to Contact Us Form is as follows:
A. Login to Blogger
2. Create two new pages in your blog
- The first page titled Contact Us, this page will be inserted HTML code.
- The second page titled Contact Confirm and then fill it with: 'Thank you for sending e-mails to us'
3. Open website EmailMeForm.com
4. Click on "Signup Now For Free"
5. Then fill out the form with yourself. Ie: username, password and email
6. Check the statement "I aggre to EmailMeForm Term of Service"
7. Then, click Next
8. Your account has been finished, now check your email and get the account verification email. Follow the instructions on the email, click the verification link.
9. Then click the Add Form

10. Next you will be asked to customize your template. In this section, you can modify at will look like what you want.
11. Confirmation Options section, check the URL Redirect option and then fill the second page with a link to the newly created earlier, so visitors will switch to this page if you have sent an email in your contact form.
12. Then click Save Form
13. The next step, copy the HTML code to the first page was created and published page.

14. Now you are ready contact form, please try.
Saturday, October 22, 2011
How to change the blog template
How to change your blog template - What is the actual blog template that? Template is a blog
or website designs website or blog page and all its components (eg
images, stylesheets, etc.) file either static or dynamic file in the
form of program or application running as a web application.
As you can see this on the blog now Kang Rohman, that the apparent
order of images and text on your screen, it was called a template. In blogger or blogspot, you can can change the template of your blog freely in accordance with the tastes and desires of each. If you have been adept at making your own templates, you can use these templates for your blog. However, if you still lay in making the template, the blogger or blogspot itself has provided a template that you can choose as you wish.
In addition, you can also download or download blogger templates free blogger templates provider, one of the examples of websites that provide blogger template is located at http://www.blogspottutorial.com, there are hundreds of templates you can use blogger for free . However, if you use a free template, conditions that must be obeyed is not allowed to delete or remove credit links from the template creator. By not throw credit link template maker, it is in appreciation for their hard work in providing a template for free.
How to change the blog template
Jump to the main topic, how to change the template on blogspot or blogger there are two ways to change blogger template supplied with, or replace the template with a template derived from a template provider. Here's his review:Replace the template provided by blogger
Here are ways to change the template with a template that has been provided by blogger:
- Please login to blogger with your ID.
- Click on the name of your blog.
- Click the menu template.

- Click the button Ubahsesuaikan

- Click on the selection of templates available. In addition, you can also choose a background or a background image of the template. If it matches one of the template, click Apply to Blog.

- Completed.
Replace template with a template from template providers
Here are ways to change the template to the template from your template:
- Download the first template that you like on the website free blog template provider. One example you can download at http://www.blogspottutorial.com.
-
Template files are downloaded, usually still in the form of compressed
(zip or rar), so you need to extract or describe the file with software
extractor such as WinZip or WinRar, but if you do not have the software,
you can extract them online at http: / / wobzip.org.
- That later in the upload or upload to blogger is just a file extension. Xml.
- Please login to blogger with your ID.
- Click on the name of your blog.
- Click the Template menu.

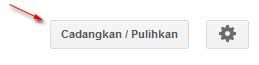
- Click the Backup / Restore which is at the top right of the monitor.
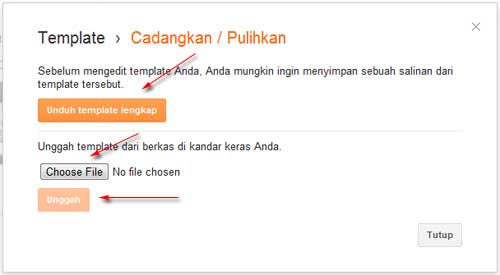
- It is advisable to make a backup first, click on the Download Full Template.
- Click the Choose File button, select the template file that was downloaded and extracted (file extension. Xml only). Then click the Upload button.
- Wait a while until the process is complete
- Completed.
Now view your blog feels more fresh than the previous
Good luck!
Wednesday, October 12, 2011
Cellular menu setting and email in blogger
- Did you know that to publish the article to the blog do not
necessarily have to go through blogger dashboard, but can also use a
hand phone or email. All you need is to setup the menu Mobile and Email.
Here are the steps Cellular menu settings and email
* Go to blogger with your ID.
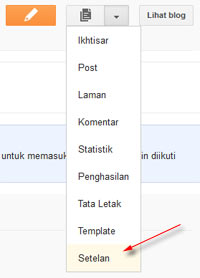
* Click the dropdown menu, then click Settings

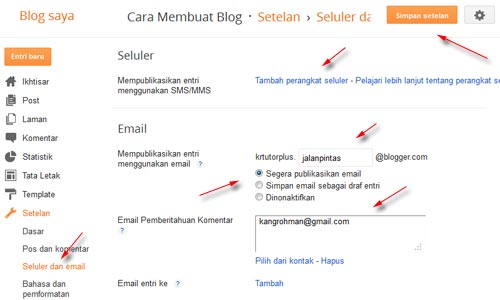
* Click on Cellular and email

Publish the entries using SMS / MMS
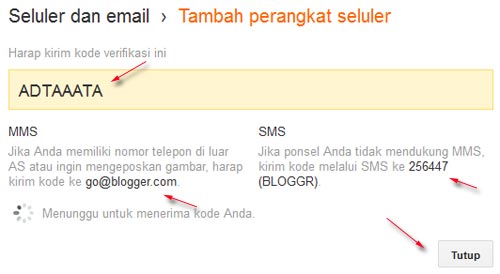
Click Add to add the mobile device is your mobile phone. Verification code will appear. Save the code of your mobile phone to the address go@blogger.com (MMS). If your mobile phone does not support MMS, send verification code to 256447 (BLOGGR).

Publish the entries using email
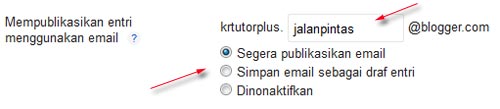
Here you have to create an email address confidential, fill out a blank form with a secret word that you want. For example: jalanpintas. This will be a secret email address, the format is like this:
emailanda.katarahasia @ blogger.com
As an example because I was using the word: jalanpintas, the secret email address is:
krtutorplus.jalanpintas @ blogger.com

Henceforth, if you want to make a post, make a post and send to email address earlier.
However, you need to select the available options.
Immediately publish email: This means that if you send a post to a secret email address that was made, it will automatically published to your blog.
Save emails as draft posts: this means that if you send a post to a secret email address that was made, the post was not immediately published, but are stored on the post draft. If you want to publish a draft post, you have to log into blogger and publish manually.
Disabled: this means of email post feature disabled.
Email Notification Comments
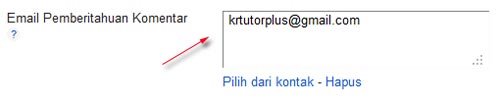
Fill this form to the email address you want, when someone commented, it will send a notification.

Email entries to
It's kind of Carbon Copy (CC), so if you post will automatically be sent to that address.
Click Save settings to save the settings.

Completed.
Here are the steps Cellular menu settings and email
* Go to blogger with your ID.
* Click the dropdown menu, then click Settings

* Click on Cellular and email

Publish the entries using SMS / MMS
Click Add to add the mobile device is your mobile phone. Verification code will appear. Save the code of your mobile phone to the address go@blogger.com (MMS). If your mobile phone does not support MMS, send verification code to 256447 (BLOGGR).

Publish the entries using email
Here you have to create an email address confidential, fill out a blank form with a secret word that you want. For example: jalanpintas. This will be a secret email address, the format is like this:
emailanda.katarahasia @ blogger.com
As an example because I was using the word: jalanpintas, the secret email address is:
krtutorplus.jalanpintas @ blogger.com

Henceforth, if you want to make a post, make a post and send to email address earlier.
However, you need to select the available options.
Immediately publish email: This means that if you send a post to a secret email address that was made, it will automatically published to your blog.
Save emails as draft posts: this means that if you send a post to a secret email address that was made, the post was not immediately published, but are stored on the post draft. If you want to publish a draft post, you have to log into blogger and publish manually.
Disabled: this means of email post feature disabled.
Email Notification Comments
Fill this form to the email address you want, when someone commented, it will send a notification.

Email entries to
It's kind of Carbon Copy (CC), so if you post will automatically be sent to that address.
Click Save settings to save the settings.

Completed.
Friday, October 7, 2011
Setting the menu language and formatting in blogger
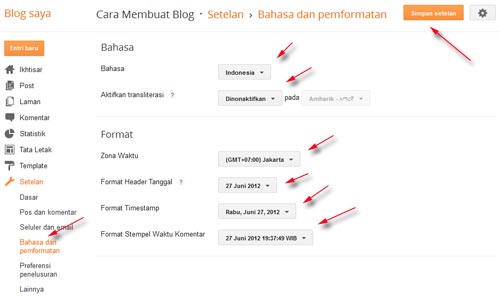
Here are the steps and formatting language menu setting:
- Please login to blogger with your ID.
- Click the dropdown menu, then click Settings

- Continue to click the menu language and formatting

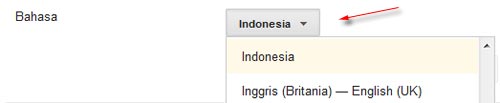
Select the language you want to use. For example: Indonesia

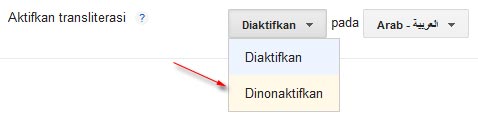
Enable transliteration
This is to enable the transliteration at the time of posting. Examples for transliteration into Arabic, Hindi and others. If you do not need it, select Disabled.

Time Zone
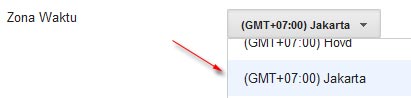
Select the time zone you want. Example: GMT +7:00 jakarta

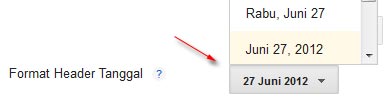
Date Header Format
This is to set the date display

Timestamp Format
Timestamp is to set the display

Comment Time Stamp Format
This is to set the display Timestamp comments

End the settings by clicking the Save button on the right settings on the monitor.

Completed.
Subscribe to:
Posts (Atom)